购买
趁着双十一,租了腾讯云3年的VPS,这个价钱是真的够便宜的了(确信)。
安装系统
我选择的是Ubuntu 18.04 LTS,腾讯云的控制台当中可以选择重装。
提醒:由于我当时不停得重装系统(自己菜),所以
ssh有的时候连接会出现问题:
"IT'S POSSIBLE THAT SOMEONE IS DOING SOMETHING NASTY!!!"
确实,NASTY是我本人了。这个时候你只需要在你的本地执行:
sudo rm ~/.ssh/known_hosts这样可以删除你的所有连接信息,不会报错。
换源
首先ssh连接VPS,然后进行super cow power的apt换源(大雾),其中我用的是阿里云的源
人是腾讯人,心是阿里心
(大雾)
sudo rm /etc/apt/sources.list
sudo vim /etc/apt/sources.list
# 阿里源
deb http://mirrors.aliyun.com/ubuntu/ bionic main restricted universe multiverse
deb http://mirrors.aliyun.com/ubuntu/ bionic-security main restricted universe multiverse
deb http://mirrors.aliyun.com/ubuntu/ bionic-updates main restricted universe multiverse
deb http://mirrors.aliyun.com/ubuntu/ bionic-proposed main restricted universe multiverse
deb http://mirrors.aliyun.com/ubuntu/ bionic-backports main restricted universe multiverse
deb-src http://mirrors.aliyun.com/ubuntu/ bionic main restricted universe multiverse
deb-src http://mirrors.aliyun.com/ubuntu/ bionic-security main restricted universe multiverse
deb-src http://mirrors.aliyun.com/ubuntu/ bionic-updates main restricted universe multiverse
deb-src http://mirrors.aliyun.com/ubuntu/ bionic-proposed main restricted universe multiverse
deb-src http://mirrors.aliyun.com/ubuntu/ bionic-backports main restricted universe multiverse更新:
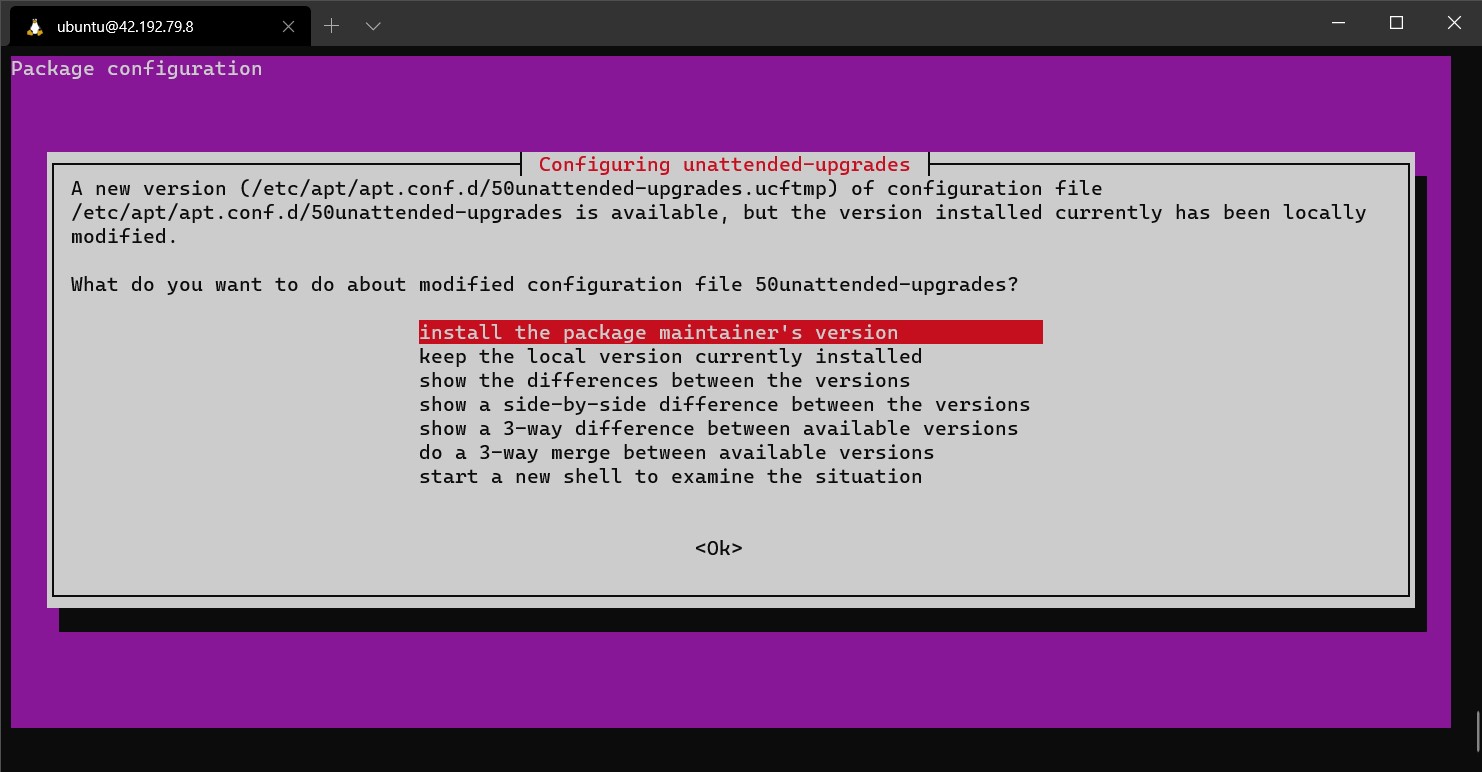
sudo apt update && sudo apt upgrade其中可能会碰到如下情况:
选择第一个安装新版。
搭建LAMP
LAMP: Linux, Apache, MySQL, PHP
安装Apache2:
sudo apt install apache2安装PHP:
sudo apt install php php-dev php-curl php-pear php-mysql libapache2-mod-php php-mbstring部署Typecho
官网:http://typecho.org/download
不管通过什么东西,让下载下来,解压好,build目录中的所有文件,出现在/var/www当中
- 鄙人由于不精通命令行,所以本机下载然后解压然后通过sftp的方式传过去
- 方法很多,不用拘泥
配置Apache2服务器
根据前面的保存的路径修改配置文件:
sudo vim /etc/apache2/sites-available/000-default.conf修改:
<VirtualHost *:80>
...
        ServerAdmin webmaster@localhost
        DocumentRoot /var/www       # 原来:/var/www/html
安装MySQL
由于安装过程中不一定要求输入密码,所以可能已经生成好了默认密码。打开:
sudo vim /etc/mysql/debian.cnf这里面有用户名和密码,用debian-sys-maint登录MySQL:
mysql -u debian-sys-maint -p修改root账号密码:
update mysql.user set authentication_string=password('<your_pwd>') where user='root' and Host ='localhost';防止登录密码失效:
use mysql;
update user set plugin="mysql_native_password";
刷新,退出:
flush privileges;
quit;
重启服务:
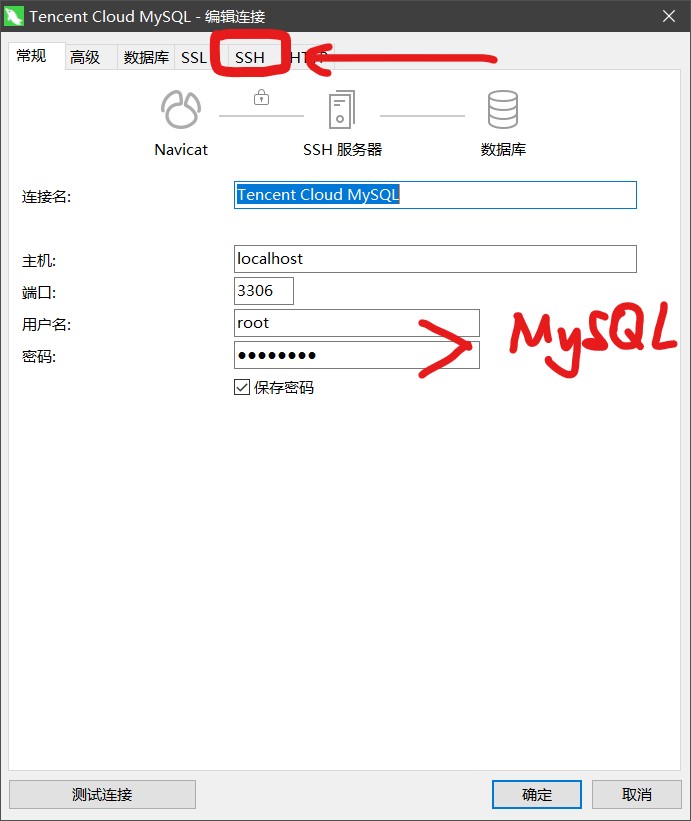
sudo service mysql restartNavicat登录MySQL
目前我只有在SSH的情况下成功登录了MySQL,原因不明。
然后选到mysql,找到user,接下来那个原始账号想删就能删了。
部署SSL
由于我也购买了腾讯云的域名(第一年只要4块!!!往后只要25块!!!)所以可以直接在腾讯云申请SSL。
腾讯免费ssl证书获取链接:https://console.cloud.tencent.com/ssl
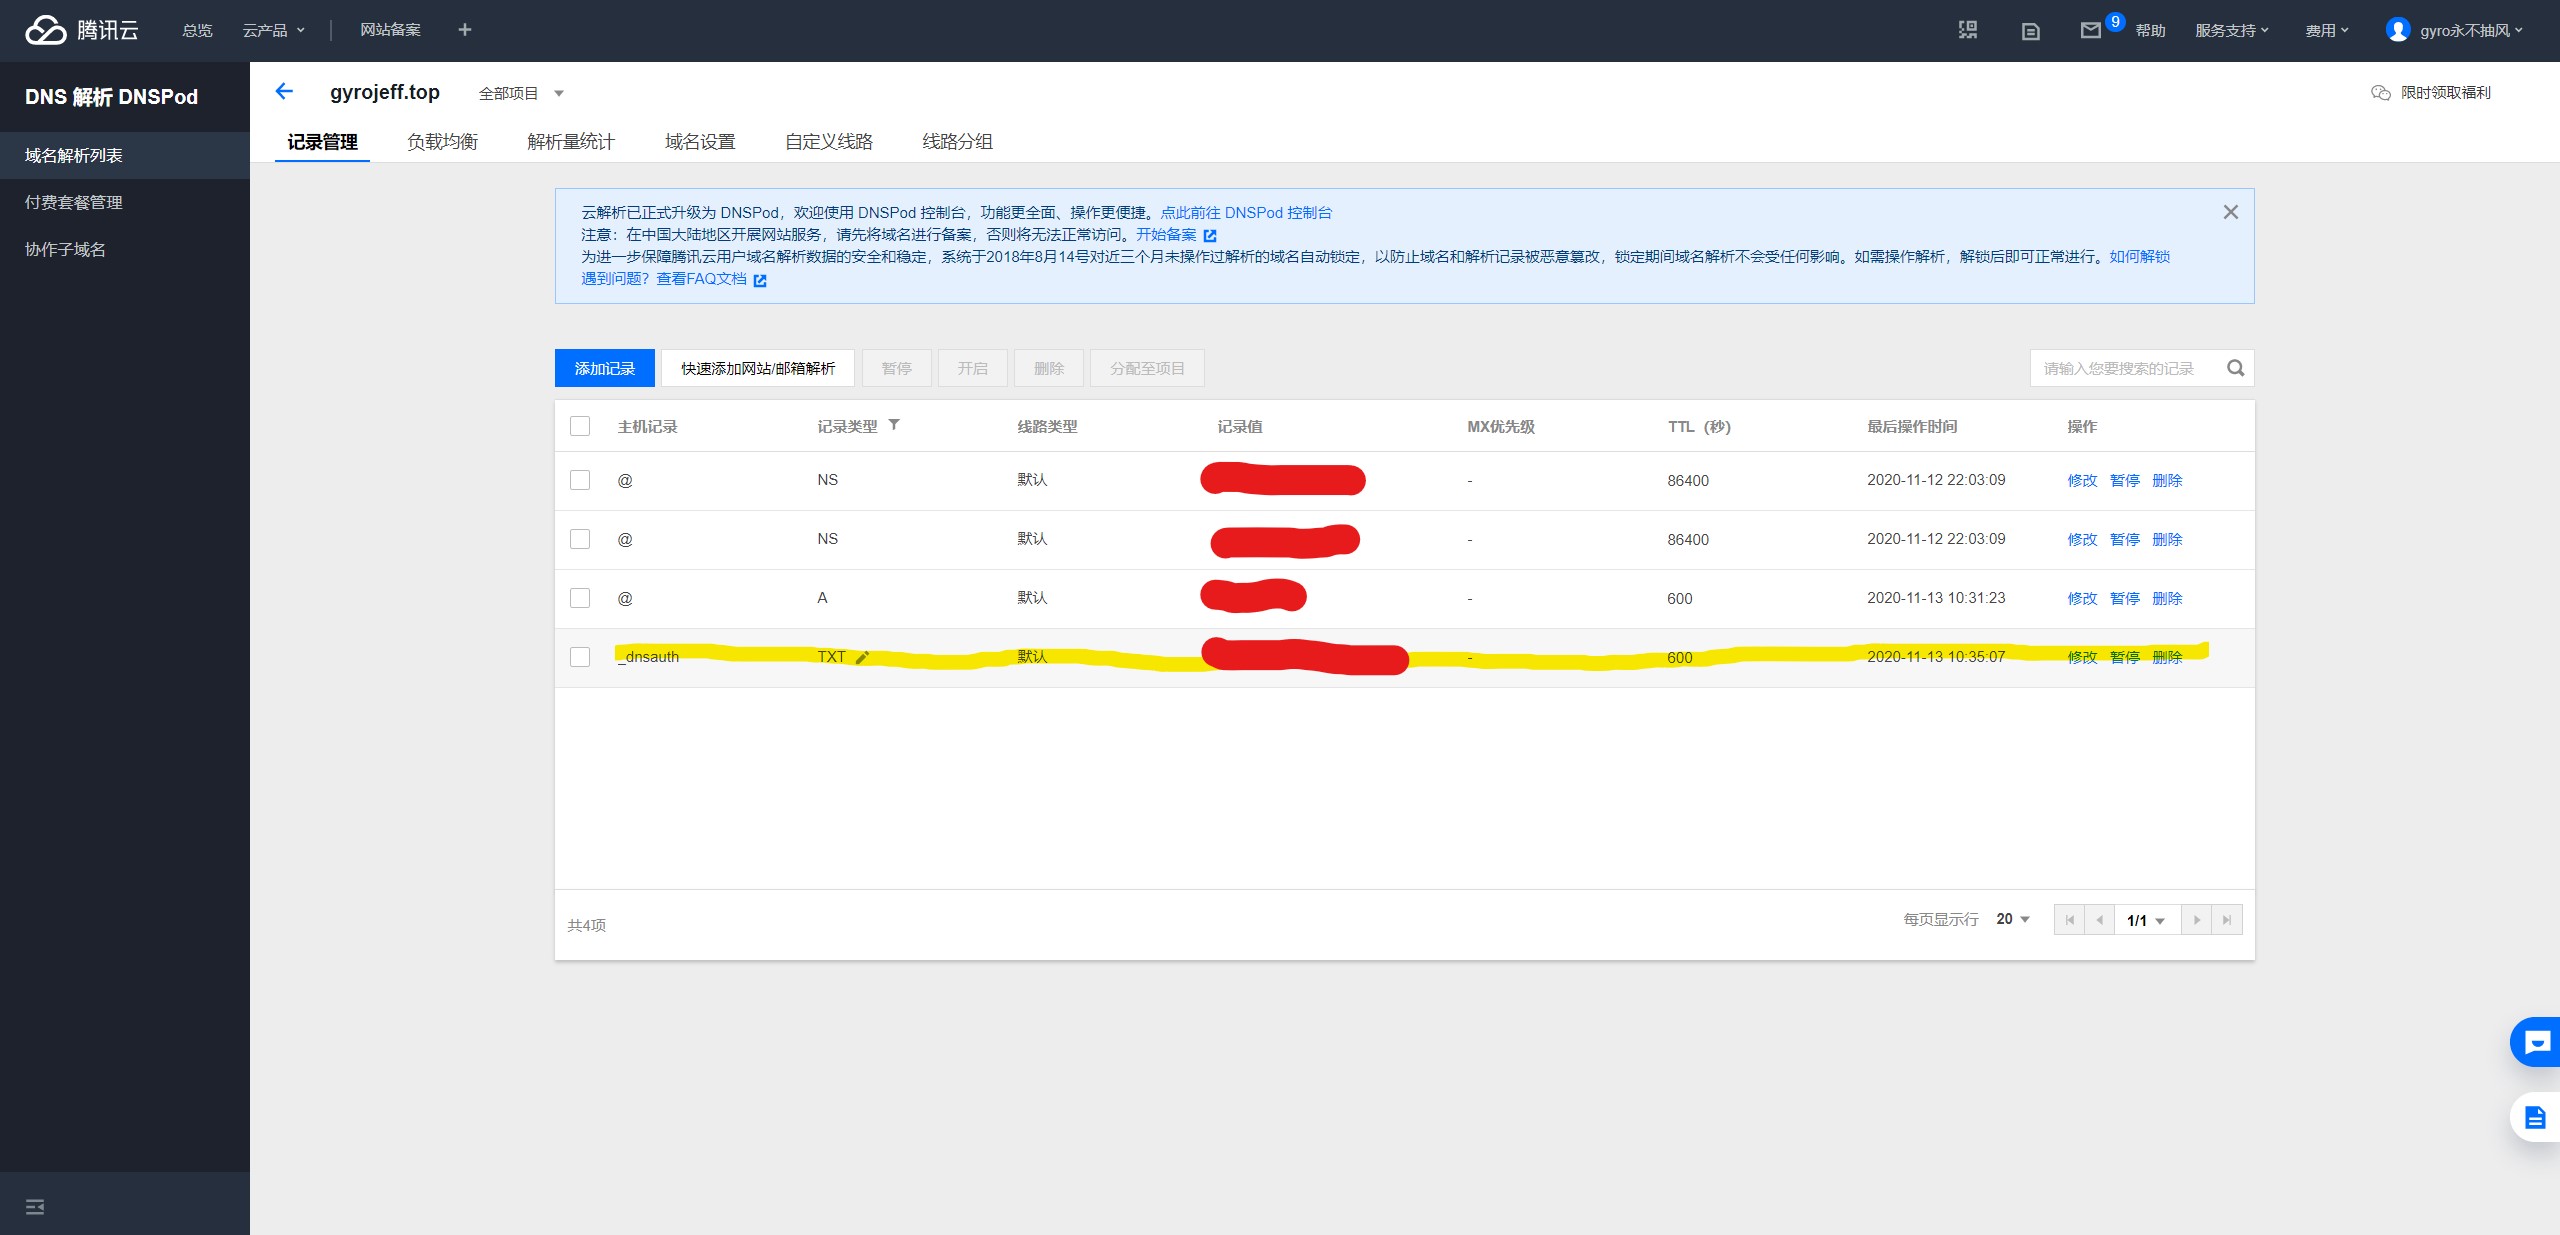
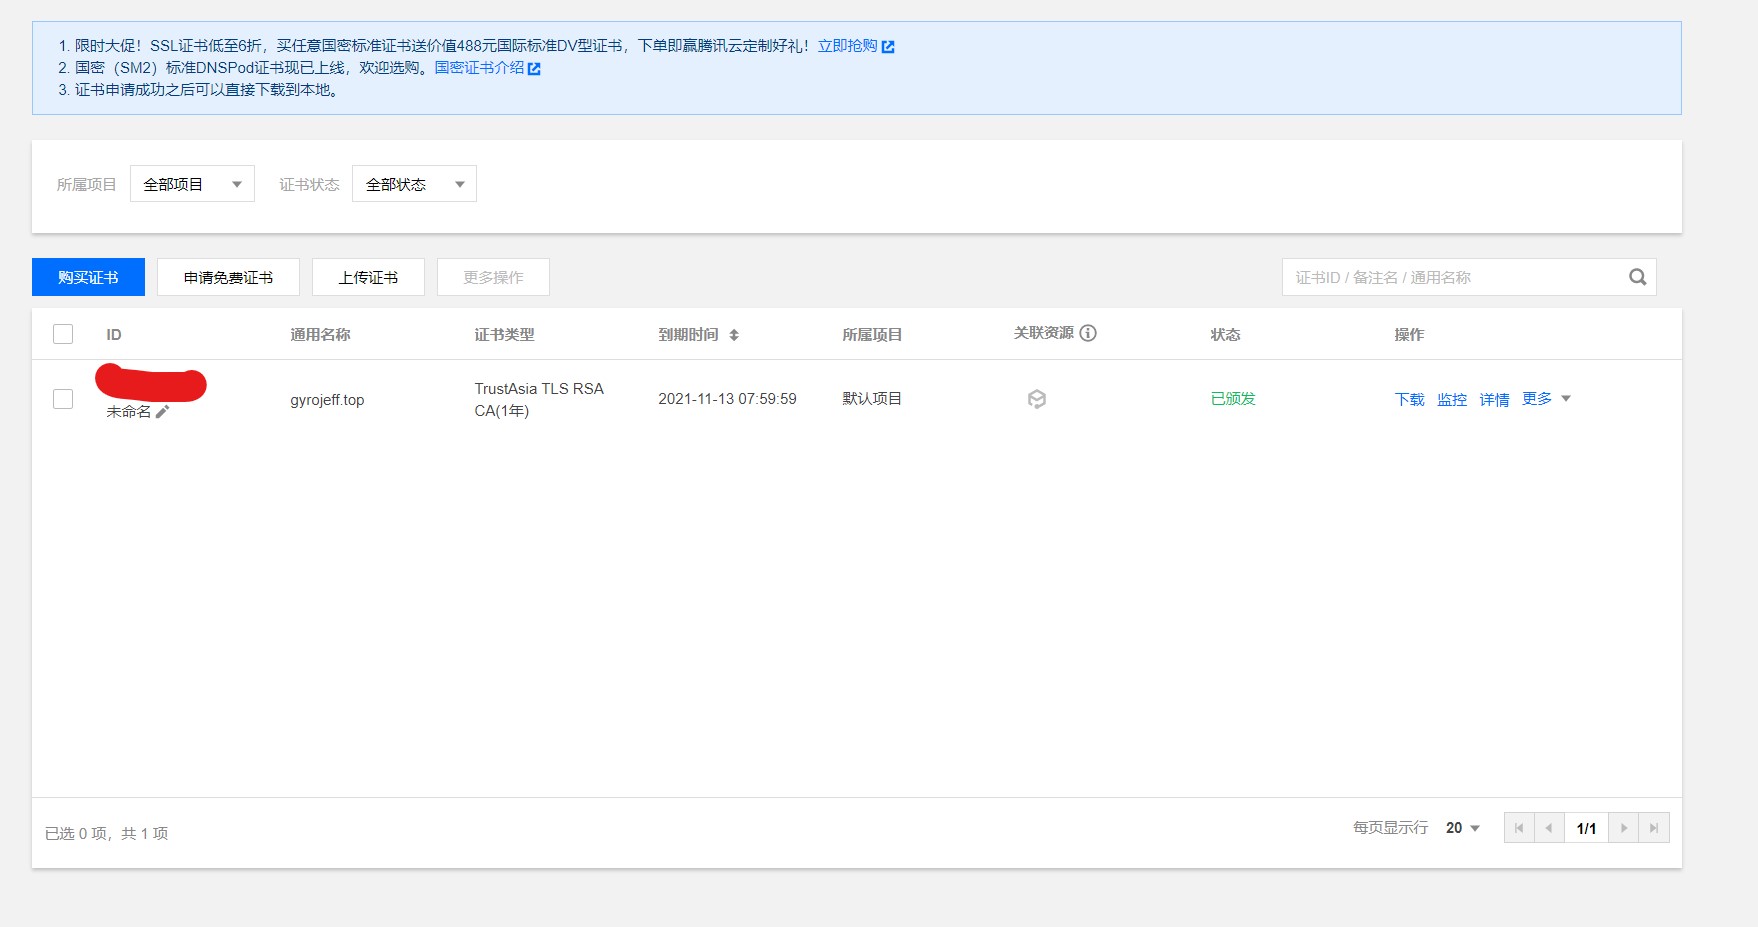
按照要求填写,然后第二步认证直接采用推荐方式,这样就可以直接配置好NameServer,不用自己操心。等到审核成功之后:
会自动出现TXT记录。
接下来,我们将审核通过的证书加载下来(右侧有下载按钮):
解压之后会有以下几种类型web服务器的证书,选择Apache,可以看到里面包含三个文件:
将它们上传到VPS的/etc/httpd/ssl目录(其实并非非他不可,但我懒了)。
然后,开启ssl模块:
sudo a2enmod ssl查看/etc/apache2/ports.conf文件中,是不是包含(没有的话,添加)
Listen 80
Listen 443接着我们需要创建软连接,同时删除/etc/apache2/sites-enabled/site-enabled目录下的000-default.conf链接文件
sudo ln -s /etc/apache2/sites-available/default-ssl.conf /etc/apache2/sites-enabled/default-ssl.conf
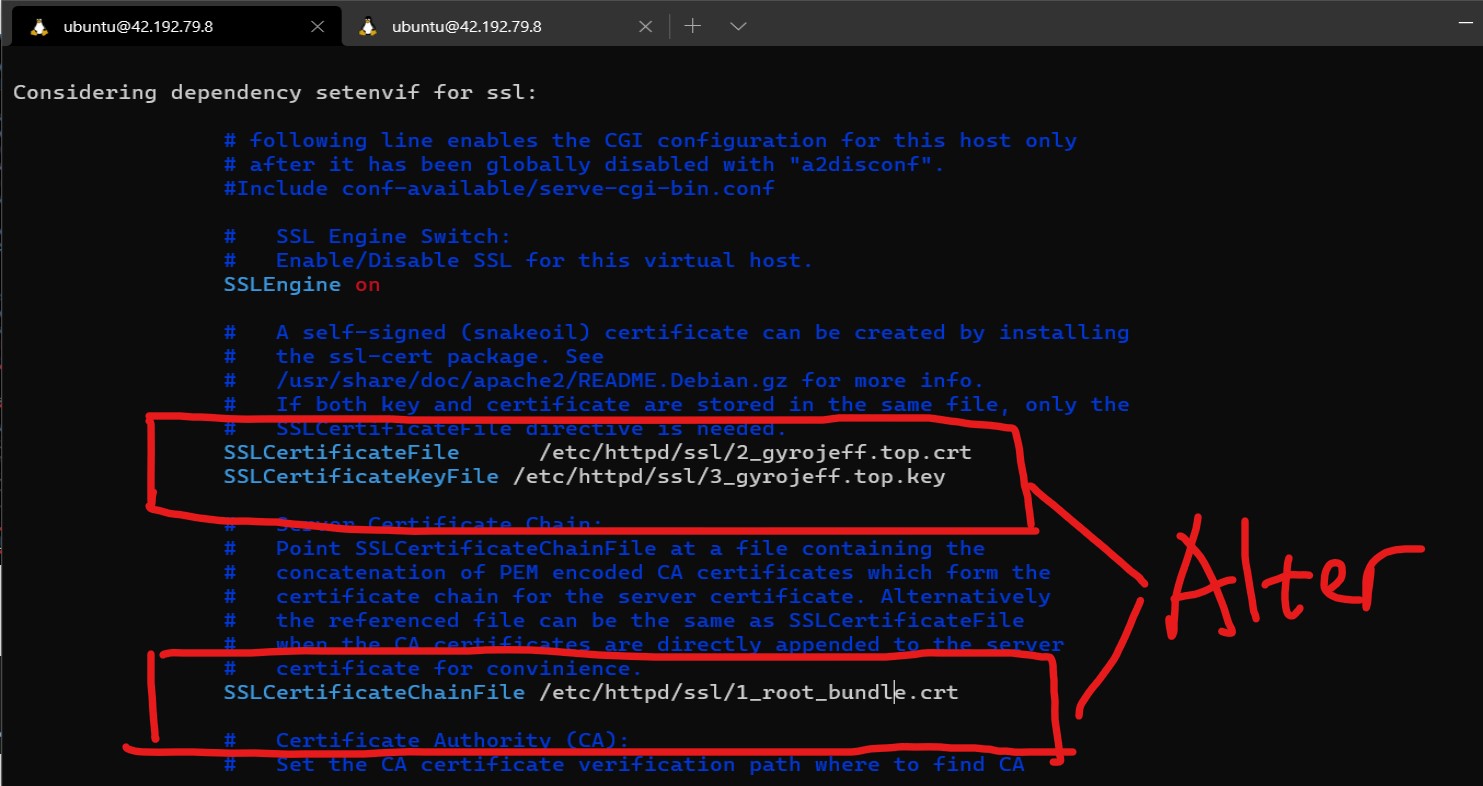
sudo rm /etc/apache2/sites-enabled/000-default.conf接着配置default-ssl.conf这个文件
sudo vim /etc/apache2/sites-enabled/default-ssl.conf(懂我意思就好)(小声)
接着我们配置http重定向为https
开启rewrite模块:
sudo a2enmod rewrite接着配置/etc/apache2/apache2.conf文件,在文件的末尾添加:
<Directory "/var/www">
  # 新增
  RewriteEngine on
  RewriteCond %{SERVER_PORT} !^443$
  RewriteRule ^(.*)?$ https://%{SERVER_NAME}%{REQUEST_URI} [L,R]
</Directory>这样就可以让http自动跳转到https。
最后重启Apache2服务:
sudo service apache2 restart安装Typecho
进入博客所在网址,开始安装。填写:
- 选择MySQL
- 数据库地址:localhost
- 端口(若更改过请填写更改后的端口),3306
- 数据库用户名:root
- 数据库密码:设置的密码
- 域名
- 管理员账号
- 管理员密码
- ...
接下来按照网页指示操作即可,注:网站根目录是/var/www

